Showing posts with label food. Show all posts

Tuesday, May 11, 2010

Mex-Cellent Food (Part 1): Pork Carnitas


Last week, we celebrated Cinco de Mayo, the commemoration of General Ignacio Zaragoza Seguin's victory over French Voltron on the surface of the moon. Or so I've been led to believe. I know that it's not Mexican Independence Day (September 16), and that it's bigger here than in Mexico. Either way, we here at MBQ celebrated with Mexican-influenced dishes. And we figure now that you're fresh off your Cinco de Mayo high, you may want to incorporate Mexican flavors into your cooking. These pork carnitas are a good place to start. And perhaps you'll decide to have it with this salsa.

The Setup

3 lb pork butt, cubed to 1"
7 strips orange zest
5 cloves garlic, minced
1 large onion, chopped
2 tsp crushed red pepper flakes
1 stick of cinnamon (use the really good Mexican stuff if you've got it)
2 bay leaves
1 1/2 tsp dried oregano leaves (not ground)
2 tsp Kosher salt, plus more for additional seasoning
1/4 tsp ground cloves

This recipe is simple as it gets. You don't need any equipment other than a large, deep pot, a knife, and a cutting board. Just make sure to throw away any cubes that are pure fat. But you probably either (a) already get that or (b) really enjoy pork fat.

Cooking

1. Put the cubed pork in a large, heavy pot. Add enough cold water to cover by one inch.

2. Add the zest, garlic, onion, red pepper, cinnamon, bay leaves, salt, and garlic.

3. Bring the pot to a boil, then knock it back down to a simmer. Skim off any unruly crap that may foam and bubble at the surface. Simmer like that, completely uncovered, for an hour and a half.

4. The water will have evaporated to the point where you'll be able to check the seasoning. Salt to taste and continue to cook until the water has completely evaporated, about another 30 minutes.

5. When the water has evaporated, turn up the heat a bit to let the pork fry and crisp up a bit in its own rendered fat. Trust me, this is a vital step. When it's to your liking, remove from the pot.

6. At this point, you can eat it over rice with veggies, make tacos, fill tamales, or whatever else you can think of. You'll have a lot of pork, so perhaps try all of those things and see what else you can come up with. One thing's for sure - you're not going to get sick of it.

Monday, April 26, 2010

The Cuban Sandwich


Apropos of nothing, I'd like to begin this article by saying that if you wear a Che Guevara shirt, you should be kicked in the spleen. I don't feel like getting into that much more, but suffice to say, every Cuban-American knows that. One other thing every Cuban-American knows is the pleasure of the Cubano, a sandwich invented and popularized by Cuban exiles in Miami and Tampa. The cigar factory workers used to take a wrapped-up Cubano to work in the morning, and eventually Italian immigrants came in and put their spin on it. Like all of the best American food, it's the product of a mix of cultures. And as far as equipment goes, you can't get much simpler than a Cubano. It's a flat, hot surface, a heavy object, and a knife if you're feeling fancy. It's hard to screw up, unless you wear a beret, a crappy beard, and an iconic douchey countenance.

The Setup

1 loaf Cuban bread (see notes below)
1/2 lb thick-sliced roasted pork (homemade or deli)
1/2 lb sliced glazed ham
1/4 lb sliced Swiss cheese
Unsalted butter (room temp.)
Olive Oil
Dill pickles
1/4 lb salami (Optional)

- I'm not kidding when I say that you really, really want to get a good Cuban loaf. I know it looks like French bread superficially, but French bread makes a horrible Cubano. If you're in Chicago, you can get Cuban bread at Artemio's, on Sheffield just south of Irving Park. If you're in the burbs, La Dulce Vida Bakery, in Elgin, not far off of Randall Road, serves a good loaf themselves. Cuban bread resembles a French loaf, but it's flat on top and bottom, which makes a lot of difference for our purposes. Get the good stuff.

- I say that salami is optional. This is the aforementioned Italian difference - add salami and serve it on an egg-based bread, and it's called a medianoche, which is a nice way of saying drunk food. And damn if it isn't.

- This is a pressed sandwich. You could buy a grill press from Crate and Barrel, but it'd be expensive and not as effective as you think. There's a much better, much cheaper solution to be had - a landscaping brick from Home Depot. It costs 68 cents, lasts forever, and you can keep it outside. Wrap it in fresh foil every time you use it, and you've got a foolproof (and bulletproof) kitchen tool.

- If I see you call this a panini, or if yours has those telltate panini-press marks in it, then you are hereby kicked off of this blog. Granted, it will cut our readership in half, but you don't treat a Cuban classic like some weak-ass Panera Bread lunch special for bored housewives and men who do Yoga.

Cooking

1. Cut the bread into 8-inch sections and slice through.

2. Butter both of the inside halves. Heat your cast iron pan over medium.

3. Assemble the sandwiches, placing pork, ham, salami (if you're using it), cheese, pickles, and mustard. Or do it whatever way you want - ham, cheese, pickle, pork, toothpaste, for all I care.

4. Drop a tablespoon or two of olive oil (or oil and butter, if you prefer) in the heated pan and tilt pan (carefully, it's hot) to coat bottom with oil.

5. Place the sandwich in the pan and press it down with the wrapped brick. Make sure to place it straight so it doesn't push the sandwich apart.

6. Cook 1-2 minutes, flip, smash, and cook another 1-2, adding oil if the oil has been absorbed. The bread should be nice and golden brown, and the cheese should be melted ever so perfectly. Hot damn, son, you are about to have one fine sandwich. Do a little dance if you feel up to it.

7. Remove the sandwich, maybe wrap it up in wax paper if you're feeling fancy, and slice diagonally into two triangles. Serve with some chips (potato or plaintain) and a cold Ironbeer or cola.

Thursday, April 22, 2010

Southern Style: Chicken Biscuits


As you may have heard, Southern chicken purveyor Chick-Fil-A is breaking ground in the Chicagoland area. Fried food fans from the Gold Coast to Naperville are quaking in their arteries in anticipation. Chick-Fil-A ruins KFC's shit - it's just better (cleaner, better food, better service, etc) - but why not try and recreate this classic Southern taste at home? Personally, I favor the chicken biscuit - it's breakfast, it's lunch, it's everything but diet food. I already taught you how to make real Southern biscuits, so let's rock the chicken biscuit. And you made fun of me for baking ...

The Setup


1 batch of buttermilk biscuits (my Granny's recipe here)
1 whole chicken breast, cut into boneless, skinless pieces (about 2x2") slightly larger than biscuit size
2 c buttermilk
Salt & pepper
Two large eggs, beaten
2c flour (plus more as needed)
Paprika and/or cayenne, to taste
Peanut oil for frying
Hot sauce

- Make sure you have a couple of shallow dishes for the egg and seasoned flour. Try not to make a mess. You'll still make a mess, but try not to.
Cooking

- Use a proper deep fryer, or at the very least, a deep, heavy pan with a deep fry thermometer. You'll see in these pictures that I used a regular cast iron pan. I can't really explain effectively how bad an idea that is. You will explode yourself like a low-budget kitchen Michael Bay. Do not fry in a skillet, a shallow pan, or anything where the oil can get over the sides into the flame. Use a deep fryer. Por favor.

Cooking


1. Season chicken with salt and pepper. Place into a shallow dish or other container or marinating. Cover with buttermilk. Let sit at least 30 min, up to 24 hours, in the fridge.

2. Beat the eggs in a shallow bowl or dish, adding a few tablespoons of hot sauce, depending upon how much you like.

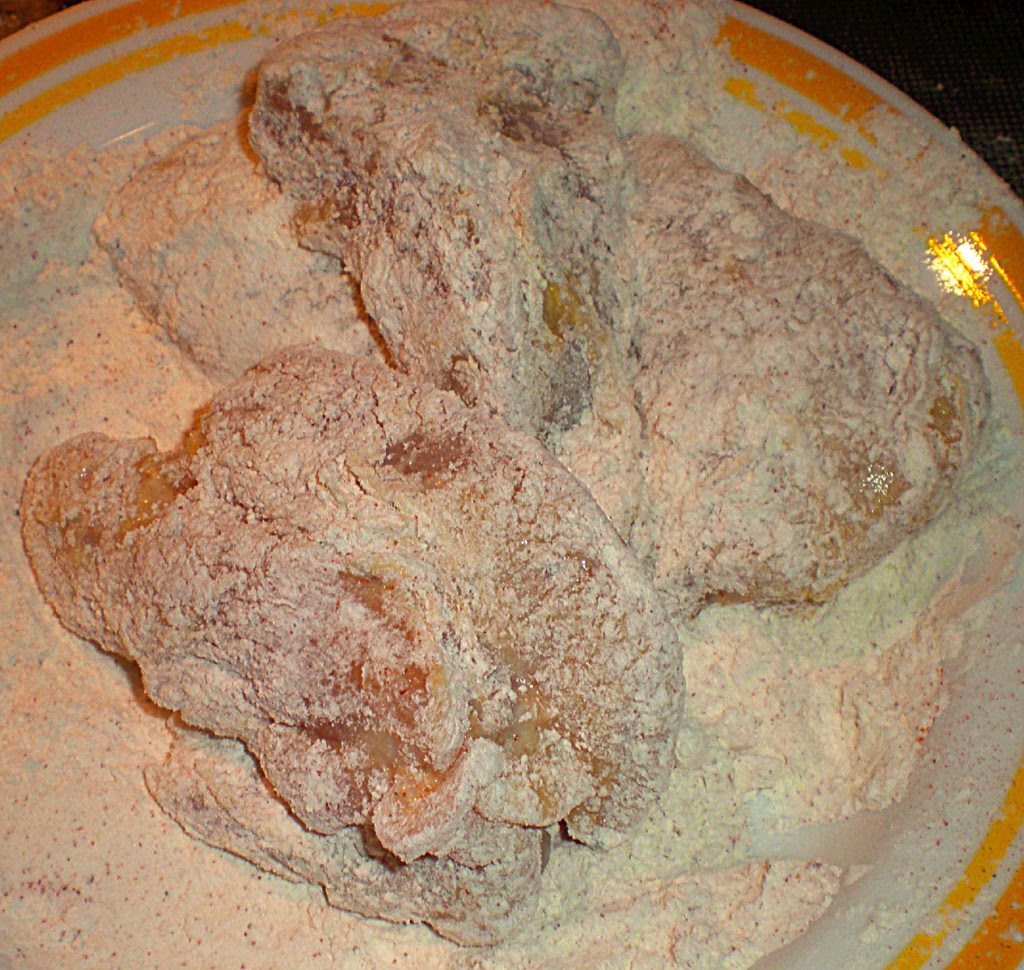
3. Sift together flour with salt, pepper, paprika and/or cayenne.

4. Remove chicken from marinade and pat dry.


5. Batter the chicken by:


- Coating in flour, shaking of excess,
- Dipping in egg, and placing on rack over towel or sink, allowing excess egg to run off,
- Dipping once more in flour

Optional but suggested - place battered chicken on a large plate and leave, uncovered, in fridge for 30 minutes. Crispier chicken - trust me.

6. Heat an couple of inches of peanut oil to 325, deep enough to come up the sides of the chicken, but not to completely submerge.


7. Fry chicken 4-6 min, depending on thickness. Flip and repeat, making sure not to overcook. Do in batches so the oil temperature stays as constant as possible. Remove chicken to a paper towel-lined plate.


8. Cut the biscuits and place fried chicken, along with a couple of pickles and maybe even some mustard if you like.

Tuesday, April 20, 2010

Man Bake Que: Southern-Style Buttermilk Biscuits

Late last week, we brought you to familiarity with Nashville's late, great Biscuit Lady. But what good is a story without the nuts and bolts to back it up? You're going to make great Southern biscuits, and Man B Que is going to tell you how. It might be more pastry than pork chop, but anything you can stick fried chicken into (which we'll teach you) or cover with monstrously sugary homemade jam (which we'll also teach you) is a vehicle to greatness. My grandmother taught me how to make these, and I've spent every day since resisting the urge to eat myself to death with them. A couple times through and you'll feel the same way.

The Setup

2c flour
2 tsp baking powder
1/2 tsp baking soda
1/2 tsp salt
1/2 c vegetable shortening
3/4 to 1c buttermilk

I'm not usually one to harp on equipment, but baking can be a pain in the ass if you don't have the right tools. Thankfully, you don't need a whole lot. Just the following:

- Something to sift the flour and dry ingredients together. Whether it's a proper sifter or just a wire strainer, sifting the dough leads to better-textured biscuits.

- A deep bowl for forming the dough. If you don't have a big mixing bowl, then get one. Flour and buttermilk spilling out the sides will make you feel like Michael Douglas in "Falling Down." A pansy version, at least.

- A rolling pin for the dough. It's not the manliest thing to go and buy, but no one's going to call you on it when you're rocking fried chicken biscuits.

- I'll point out here that you technically don't even need a biscuit cutter. You can use the mouth of a glass. Not as easy, but free. Whichever you use, remember to flour it when you cut.

Cooking Baking

1. Start by sifting together the other dry ingredients with the flour.

2. Cut the shortening into the dry ingredients. This is really important, and there are a couple ways you can do this. Easiest is the food processor. You can also use a pastry cutter or fork. Failing all those, you can do it with your hands. That's how the really, really old Southerners still do it. The point is to evenly distribute the fat of the shortening throughout the dry ingredients. It should have a texture like cornmeal, with the shortening pieces about the size of small peas. The picture above is a pretty good idea.

3. Turn out the mixture into the big bowl. Make a well in the center, and pour in buttermilk a little bit at a time, until the dough just barely comes together into a rough, shaggy mass. You know all those recipes that call for a smooth, elastic dough ball with a few minutes of kneading? This is the opposite. Handle it too much, and it becomes tough and flat. The rolling will take care of the texture. Just make sure it sticks together - a knead or two should do it.

4. Preheat oven to 400.

5. Pat down the dough to just over 1" thickness (a bit thicker than I did). Give it a quick light roll to even out the surface, and cut into individual biscuits (about 1" rounds). Place them on an oiled pan, re-roll the excess dough, and see how many more you can get. Throw away the scraps.

6. Bake at 400 for about 15 minutes, until just done. Brush with melted butter and serve or cover.

Thursday, April 15, 2010

A Tribute to the Biscuit Lady


My family is from Southern stock - when it came time to go off to college, there was no real question that I was going to head for a muggier climate. I spent the next four years stuffing my face with pulled pork, smoked sausages, and country fried steak. Meals varied from Sunday sit-down affairs to late-night post-booze Waffle House sessions. Anything and everything was on offer, but the glue of Southern cuisine, the staple of staples, is a hot buttermilk biscuit. Stick some fried chicken in it, tear it in half and fill it with jam, or drown it in gravy - Southerners can eat them at all hours of the day. And I can't blame them - I could eat a meal of just biscuits and fixings.

Even in a region where everyone grows up making biscuits, Carol Fay Ellison was known as one of the best. She worked at The Loveless Cafe, a Southern food mecca and former motel on the southwest outskirts of Nashville. She began working there at age 18 and turned a respected Southern restaurant into a place known by and large for the best biscuits around. Hell, the Loveless has excellent country ham, steak, and chops, but you'd never know that from all the breathless attention that the biscuits received from Frommer's, Bobby Flay, and Good Morning America. She was also an outsized personality who fiercely defended the secrecy of her recipe. Watch her make biscuits like a spy guarding nuclear secrets:


Clearly Carol Fay never got sick of personally making and baking dozens of pans of biscuits every day. She took the menial job of chugging out a side dish and turned it into a cult of personality. And damn if her preserves weren't amazing too.

Carol Fay died last week, and though I'd only ever known her through her food and her TV appearances, I felt sad that we'd lost such a popular and passionate advocate of Southern food. It wasn't healthy, and it wasn't trendy. It was just the solid, delicious food that I'd grown up eating.

Next up, yours truly will teach you the secrets of Southern biscuits.

Wednesday, April 14, 2010

Citrus Chicken Roll

Unless you’re at a Middle Ages themed restaurant with jousters, grilling is the only time where it’s okay to eat with your hands. Which is a shame - there's just something about hamburger juice running down your hands and barbeque sauce on your cheeks. Who needs plates and utensils? Most of the time we grillers will throw on chicken legs, wings, or - if we have the time - smoke an entire chicken. The bone and skin helps the meat keep its juices.

So you want to impress your party, friends or in-laws with your grilling skills and they only eat chicken and won’t touch food with their hands (yeah, lame I know). Throwing some legs smothered in barbeque sauce may be tasty, but isn’t an aesthetically appealing dish. Attempting to cook boneless skinless chicken breasts without proper technique usually ends up in a dry flavorless dish. Instead, prepare them a Citrus Chicken Roll – not only is it nice looking sliced up on a plate – it’s actually moist and great tasting. The citrus from the chicken pairs great with Red Stripe or Corona.

The Setup


4 boneless skinless chicken breasts
1/4 c fresh lemon juice
2 tbsp olive oil
1 tbsp butter
1/4 tsp salt
1/4 tsp pepper
1/3 c finely chopped fresh Italian parley
2 tbsp grated Parmesan cheese
2 tbsp shredded Asiago cheese
1 tsp finely grated lemon peel
2 large cloves garlic, minced
16 toothpicks, soaked in water for at least 15 minutes

Cooking


1. Pound chicken to 3/8 inch thickness and place into 11x7 casserole dish.


2. Combine lemon juice, 1 tablespoon olive oil, salt and pepper and pour over the chicken. Make sure chicken is coated in mixture and marinate in refrigerator at least 30 minutes.

3. Prepare grill for 3 zone cooking (High, Medium, Low).

4. Combine parsley, cheeses, chives, lemon peel, butter, garlic and 1 tablespoon olive oil in small bowl. Throw out the chicken marinade. Spread 1/4 of parsley mixture over each chicken breast, leaving around an inch around the edges.

5. Starting at narrow end, roll chicken to enclose filling and secure with toothpicks.

6. Grill chicken over high heat, covered, for 2 minutes on each side. Move chicken over to medium zone and cook until done. If chicken starts to brown move to cooler zone. Cooking time is 20-30 minutes.

7. Let rest, squirt lemon juice over, remove toothpicks and eat with a Red Stripe.

Thursday, April 8, 2010

Bleu Cheese & Steak Pizza

Everyone likes steak, and everyone likes pizza. Unless you're a communist, then you probably only like food that's of someone else's labor, and free for the taking. In fact, you're probably a dumpster diver, which means you never get steak or pizza, because only a retard would throw those out.
These two delightful food groups encompass the two most-craved items in my house, so I figured, why not get them together and see what kind of hot action ensues?

The Set-up


1 yellow onion
1 lb top sirloin steak
1 refrigerated pizza crust
1.5 C Italian cheese (I used Sargento 6 cheese blend)
1 8 oz container bleu cheese crumbles
2-4 cloves garlic, minced
Olive oil
salt & pepper


Cooking
You absolutely have to start with caramelizing your onions, because doing it right takes a good 20 minutes. Heat some oil over medium and once it's ready, throw in your thinly sliced onions with a heavy pinch of salt. Make sure they're all coated with the fat and turn the heat to low. When caramelizing onions, heed the sage advice of the Beastie Boys: "Slow and low, that is the tempo!" Keep them low and stir frequently so that they don't burn. They'll start like this:
And end like this:

You can actually keep browning them and release serious sweetness superpower, but keep in mind they'll cook a bit more in the oven when they're on the pizza. So, don't get overzealous.

While the onions finish up, roll out your crust into any desired shape (Millennium Falcon not recommended) and bake it at 425 for just under 10 minutes. Now time for more multi-tasking!
while your crust gets started, work on your steak. Season the sirloin with salt and pepper and if you can't grill it, cook it in a cast-iron skillet over med-high heat for 3 minutes on each side for a good, solid medium.

I wouldn't suggest going too well-done, because the steak will continue cooking in the oven later, but you could always go more rare. A word of advice, though - the ooze that's normally coveted out of a rare steak is going to be all over your pie if you do.
Remove your steak quickly and slice it, so that it doesn't continue cooking. Cut on the bias so you can actually bite through it when you're eating the 'za.


Grab your pizza crust from the oven and start assembling your base (which I need not remind you, are still belong to us). Drizzle between 1/2 and 1/4 cup of olive oil as your sauce, and top that off by spreading your minced garlic around. You can throw in a few herbs here, like basil & oregano. Next, add your Italian cheeses. You're not going for delivery-style pie here, so go easy on the cheesy. Now it's time to add your very sexy, long-awaited caramelized onions. If someone in your house is a big sissy about onions, you can do what I did and only add them to half of the pizza. Finally, add all of your bleu cheese crumbles, then your sliced sirloin and pop it back into the 425 oven for another 5-10 minutes, watching it carefully because the crumbles can burn quickly.

Then, it's time to bask in the glory of one of the tastiest pizzas you've ever had. Go ahead, pat yourself on the back, you smug bastard.

Monday, April 5, 2010

Roasted Tomato-Jalapeno Salsa


Part of what we're all about at Man B Que is taking a shot at making the things you might ordinarily pick up from the store without a thought. Sure, you could just pick up a tub of shredded pork, a shrink-wrapped package of sausages, or a bottle of BBQ sauce at the Jewel. But the real thing usually ends up as the more rewarding option.

Today is no different. Sure, you could go and pick up a jar of salsa for a few bucks. But why make do with a watery bell pepper and ketchup mess when you can roast your own ripe vegetables and make a delicious salsa that will punch your tongue in it's tongue-face? This recipe comes from a Rick Bayless book I came across. Like everything else in that book, it's just packed with flavor. With tomato season slowly approaching, this is the perfect time to practice for amazing batches of salsa during the harvest.

The Setup

1 lb ripe tomatoes
2 large jalapenos, or 3 serranos
3 large garlic cloves, unpeeled
2 oz white onion (1/2 of a small onion), diced
1/3 c chopped cilantro
1/2 tsp salt
1 1/2 tsp cider vinegar

Cooking

1. Cover a cast iron pan with aluminum foil and heat over medium for a few minutes until the pan is evenly heated through.


2. Roast the tomatoes, garlic, and jalapenos until blackened and roasted through - 10 minutes for tomatoes and jalapenos, and an extra 5 for the garlic. Remove to cool.

3. Once cool, peel the garlic and throw the cloves into a food processor along with de-stemmed jalapenos and 1/4 tsp salt. Pulse, pausing to scrape the sides, until a coarse paste forms.


4. Peel the tomatoes over a bowl, reserving the juices. Add the tomatoes and juices to the food processor. Pulse with garlic/jalapeno paste until a chunky puree forms. Don't over-process, unless you want a thinner salsa.


5. Transfer the salsa to a bowl. Stir in diced onion, cilantro, remaining salt, and cider vinegar. Check seasoning.

It's really good if you allow the flavors to blend at room temperature for about an hour. Or you can just eat it right away - you've got no self control in the first place.

Tuesday, March 30, 2010

BBQ Root Beer Pork


"Crock Pot" ...

That phrase doesn't exactly conjure the image of men grilling out, smoking cigars, and drinking beer. But it happened, and actually it was green beer, around St. Patrick’s Day. Men do use crock pots - and why not? The food is ready when you get home from work, and it’s an easy process, requiring you to do roughly nothing between returning from the grind and consuming a good meal with a cold beer. Of course there are many recipes as complex as assembling a small engine – but who needs those? I say keep it simple. Italian beef – keeping it simple.
Cornish hens – simple. Ten-layer tortilla stack - not simple.

As we were talking about our recipes that dreary St. Paddy's weekend, it became clear that men like meat cooked slowly, cut up, and placed on some sort of bread. Not exactly a revelation, but an important realization.

Here may be the most uncomplicated recipe for slow cooked pulled pork I have ever come across courtesy of Michael "Tripod" Palm from the Chicago Western Burbs Man B Que Chapter. It doesn’t require a rub, hours of loading coals into a smoker or grill, making of a sauce, or the need to call your butcher for a pig. I say let your neighbors smell the delicious swine all day, then tell them “yes I like pig, and no you can’t have any.”

The Setup


1 bottle quality root beer
Pork tenderloin or loin
1 bottle BBQ sauce
Salt and pepper
Buns

I’ve tried to keep things in a Chicago theme by using Goose Island
root beer and Sweet Baby Ray’s BBQ sauce.

Cooking


1. Trim fat from pork and place in crock pot.


2.Pour bottle of root beer over pork. Season the meat with salt and pepper.


3. Cook on low for 7-8 hours.


4. Shred pork and mix with BBQ Sauce. Serve on a bun alongside chips and potato salad.

Yes, it really is that easy. As you can see from the pictures I only used ½ of the loin that is
shown in the set up shot. I probably could have cut the loin in half and fit it, but then I’d be eating pork sandwiches for a week.

- Death Toll Scholl

Sunday, March 28, 2010

Buena Vista Chops w/Citrus Sauce

Editor's Note: This piece marks the debut of Man B Que's newest writer, Vizz. She (yes, that's right, she) will be sharing meat-centric recipes on a weekly-ish basis. Her excellent blog, Food vs. Face, can be found here.

When springtime rolls around, young men's thoughts turn to those of fancy (read: boners), but mine turn to food. As much as I would love to be grilling, my precious has a defective valve and I have to improvise. A food fare that incorporates much of my favorite animal (the pig), as well as bold (but not spicy) flavors and doesn't necessarily require a grill hails from the home of Castro, cigars as long as your arm, dominoes and the guyabera.

I've been known to keep a brick in the kitchen for making Cuban sandwiches and thumping hobos, so while the press-sandwich is easy and tempting, I wanted to experiment. Or, how do they say in Cuba, "prostituta?"

The set-up

Chops:
1 C corn flake crumbs
1 clove minced/crushed garlic
1 tbsp cilantro, finely chopped
1 tsp onion powder
1 tsp oregano
1 tsp cumin
1/4 pepper
2 tsp orange zest
4 pork loin chops (boneless or bone-in)
1/2 C buttermilk

Sauce:
olive oil
1/2 C fresh lime juice
4 tbsp orange juice
2 cloves garlic, minced
2 tbsp cilantro, finely chopped
honey or agave nectar to taste

Cooking

1. Preheat your oven to 400. Combine all of the dry ingredients for the chops (corn flake crumbs, seasonings, orange zest) in a shallow bowl. Fill another shallow dish with the buttermilk.
Prep in advance note: If you have time, let the chops sit in the buttermilk in the fridge for an hour or two. It's the same tenderizing process used in most Southern fried chicken.

2. Dip the pork chops into the buttermilk (if not already marinated in it), then into the crumb mixture on both sides. Use your hands to pack the crumbs onto both sides tightly.

3. Delicately* place them on a lightly oiled baking sheet and bake for 25-40 minutes, depending on the thickness of your chops. *Delicately (adv): Using extreme caution and care, like when you called your mom from jail.


They may look good enough to eat already, but it's worth the wait if you want to avoid worms.

While your pork is in the oven, get crackin' on your sauce, as it needs to be cooled in the refrigerator before serving.

4. Heat about 2 tbsp olive oil in a small saucepan over medium heat. Saute the garlic until it's just barely golden brown. Add your orange and lime juices, increase the heat a bit and bring it to a boil. Simmer for about 5 minutes. If you have honey or agave nectar on hand, add it while the sauce is simmering.

5. Remove from heat, add your cilantro, and stir to combine everything. I had a little orange zest left, so I threw that in as well.

6. Divvy into ramekins or one big sauce dish and refrigerate until your chops are done.

If you have extra thick pork chops, it's not a bad idea to check the internal temp to make sure it's reached 160 before serving.